Application Profiler in IDE 4.5: Installation and Usage Instructions#
Installation#
- Install Momentics 6.3.2 on the host machine (Windows or Linux). Probably would work on any other 6.3 or 6.4 SDK you have.
- Install latest IDE 4.5 on host machine from http://community.qnx.com/sf/wiki/do/viewPage/projects.ide/wiki/Builds_Tau_Integration or if you have it already installed, install latest updates for IDE 4.5 from update site: https://www.qnx.com/account/updates/foundry27/ide/tau (see below how), update from IDE 4.0.1 would not work, you have to install new IDE from a zip first.
- To install full IDE 4.5 from a .zip file pick one archive for your host platform from location above
- Download it and unzip where you want. This would be your IDE 4.5 installation directory.
- Run IDE: execute qde from the IDE installation directory.
- To use update site
- Open Help->Software Updates->Find and Install...
- Select Search for new features to install. Click Finish.
- Click New Remote Site and enter URL (https://www.qnx.com/account/updates/foundry27/ide/tau) and name "IDE 4.5 Integration builds update site".
- Select this site. Click Finish.
- Select All Features. Click Finish. Select Install All. Restart IDE.
- Install profiling library for Instrumented run (only for 6.3.2, 6.4 contains this patch)
Build & Launch#
Sampling Mode #
Sampling is original mode of old Application Profiler, you still can use it.
To use basic sampling no recompilation is required. If you want to use calls count instrumentation see below.
This mode won't give you precise function times and you rely on the fact the application is running for a long time. It would be almost the same as old profiler except a little bit better editor annotations and compare session support.
Builds Flags#
- For Makefile use option -p for compiling and linking
- For Qnx projects
- Open Project context menu, select Properties->Qnx C/C++ Project->Options tab
- Select "Build for Profiling (Call Count Instrumentation)"
- For Manged Project with QNX toolchain
- Open Project context menu, select Properties->C/C++ Build->Settinfs->Tools settings->QCC Compiler->Output Control
- Enable "Call Count Profiling (-p)"
- Select QCC Linker->Output Control
- Enable "Call Count Profiling (-p)"
Launch from IDE#
- Create a launch configuration for your application, add Tools->QNX Application Profiler from Tools tab
- Select Sampling and Call Count Instrumentation
- Select Single Application
- Check Switch to this tool Perspective after launch
You application would start as well as Application Profiler monitor, Application Profiler perspective would open and Execution Time would would show data from current session with automatic refresh enabled.
Launch from command line#
You have to be "root" to get sampling from your application launched from command line. By default it would create gmon.out in current directory.
You can override location using PROFDIR env var. After application finished or you stopped profiling transfer file on the host and import it into the IDE.
Alternately you can launch process on target and attach from IDE. In this case you need to use env var QCONN_PROFILER.
- PROFDIR=dir -- turn on data collection. Data is stored in a file dir/processId.binaryName. For example if you run PROFDIR=/tmp ./myapp, the data would be available in the file named /tmp/12345.myapp. Use this option for postmortem profiling.
- QCONN_PROFILER=/dev/profiler -- setting this variable to a fixed value causes data collection to be turn on, and data is then sent to the /dev/profiler resource manager, which sends it to the IDE. Use this option when attaching to a process from the IDE.
Function Instrumentation Mode for Single Application#
This method allow to get precise functions execution time.
Currently it does not work for multi-threaded apps - time spent in different thread would be double-counted.
Build Flags#
- For Qnx projects
- Open Project context menu, select Properties->Qnx C/C++ Project->Options tab
- Select "Build for Profiling (Function Instrumentation)"
- For Manged Project with QNX toolchain
- Open Project context menu, select Properties->C/C++ Build->Settinfs->Tools settings->QCC Compiler->Ouput Control
- Enable "Function Instrumentation Profiling (-finstrument-functions)"
- Select QCC Linker->Output Control
- Enable "Function Instrumentation Profiling (-lprofilingS)"
- If you using Makefile
- to compile application/library with instrumentation add option -finstrument-functions
- to link add option -lprofilingS (see Installation section above to install this library)
If you have code of interrupt handler or critical code you cannot instrument these functions (target would hang if you attempt to run it in file mode, you can still run in kernel trace mode, see below).
To avoid instrumenting them, you can either excluded these file from files compiled with -finstrument-functions flags, or you can exclude specific functions using gcc attribute:
__attribute__ ((no_instrument_function))
e.x.
  void __attribute__ ((no_instrument_function))
interrupt_handler(void * arg) {
  ...
}
Launch from IDE #
- Assuming you have your code as IDE Project and binary/library located there
- Create new Launch configuration
- In Tools tab select Add Tools... and select QNX Application Profiler
- Select Function Instrumentation (NOT Sampling)
- Select Single Application
- Click Apply and Run.
- If process does not finish itself, you have to kill it because this would be sign to IDE to download data (if you don't use mode "Update while running").
- Instead of terminating process you can just terminate QNX Application Profiler service in the Debug view, it will download current state of data.
- Please note: this version is not optimized for data transfer. Each second of application running can generate up to 2Mb of data.
Launch from Command line on target #
To launch on target:
- To launch in file mode set QPROF_FILE env var to /tmp/profiler.ptrace (does not really matter what file, but matter where is it - it can be huge)
- launch binary, perform test and stop it after some time, because trace cannot hold more than several seconds, minutes at most.
- In IDE. Copy file $QPROF_FILE into IDE workspace (into target project for example) using Target File System Navigator view and import file into IDE (see below).
- Alternately you can attach to running process from IDE using Profile->Attach... mode, just make sure you specify same file. In this case IDE would work as if you launched app from IDE, you don't need any manually import steps to be performed.
Import into IDE#
To import existing trace into the IDE you need:
- trace file
- binary file
- shared libraries
- source code, imported into IDE (optional)
If you have not built code in the IDE, I recommend perform the following steps:
- Create fake C Makefile project
- Import your binary into IDE, using right-clck->Import..->From File System
- Create a directory src linked to real sources (New->Folder->Advanced...->Browse...->pick a root of sources->Finish)
Importing Trace
- Switch to "Application Profiler" perspective
- In Profiler Session view select action Import
- Follow import wizard and specify binary and shared libraries paths. If binary was not compiled on the same host you need to edit source path tab to add source search path or mapping between compiled code location and location of the sources on the host.
- Click Finish. IDE would create a session and automatically select it.
Function Instrumentation Mode for System Profiler#
If you want to see functions names in System Profiler timeline view you may want to consider adding this information by Instrumenting you binaries with Function instrumentation library and running in kernel events mode.
Build Flags#
- Use instructions from section above to build one or more binaries/libraries with -finstrument-functions
Instead of instrumenting all functions, you can manually insert enter/exit events
Enter event:
#include <sys/trace.h>
...
void * from = __builtin_return_address(0); // this function address
void * callsite = __builtin_return_address(1); // calling function address
TraceEvent( _NTO_TRACE_INSERTSCLASSEVENT, _TRACE_SYSTEM_C >> 10, _NTO_TRACE_SYS_FUNC_ENTER, (unsigned)from, (unsigned)callsite);
Exit event:
TraceEvent( _NTO_TRACE_INSERTSCLASSEVENT, _TRACE_SYSTEM_C >> 10, _NTO_TRACE_SYS_FUNC_EXIT, (unsigned)from, (unsigned)callsite);
Launch from Command line on target#
- set environment variable QPROF_KERNEL_TRACE=1 (for each process or export it for all processes. It won't affect non instrumented binaries)
- launch one or more processes or target
- In IDE open System Profiler perspective and run Kernel Logging for several seconds (or run tracelogger from command line)
- Open resulting .kev file in System Profiler editor
- Alternatively you can import .kev file into Application Profiling from Profiler Session view or using standard File->Import dialog. Note: .kev file and binary has to be in workspace to import successfully. Binary name has to match with the process name in the .kev file exactly - otherwise session would be empty.
- You can import selected part of .kev file into Application Profiler. To do that - save selection using Save As.. from file menu, and import resulting .kev file into Application profiler.
Capture trace in specific area of the code#
Start tracelogger in daemon mode, where it is ready to go but not logging.
# tracelogger -d1 -E -w -c -S32M -M -v &
and then in your application, start tracing with
TraceEvent( _NTO_TRACE_START );
and stop with
TraceEvent( _NTO_TRACE_STOP );
TraceEvent( _NTO_TRACE_FLUSHBUFFER ); /* make sure to get the last partial buffer out */
(Using this approach you can use either instrumentation with QPROF_KERNEL_TRACE=1 or manually inserted logging events)
Launch from IDE#
- If you want to profile process right after the start, first create a launch configuration for the binary
- In Tools tab select Add Tools... and select QNX Application Profiler AND select Kernel Logging
- In Application Profiler tab
- Select Function Instrumentation (NOT Sampling)
- Select System Wide
- De-select Switch to this tool's perspective on launch if selected
- Click Apply
- Switch to Kernel Logging tab
- Enable "Launch with Kernel Log capturing"
- Select one of existing System Profiler Kernel Log configurations.
- If you don't have any, first save you current launch configuration, then select edit and create one. Make sure target selected for kernel mode is the same as target select for launch configuration.
- Select Switch to this tool's perspective on launch if not selected
- Click Apply
- Open Upload tab or Launch configuration
- De-select Use unique name (for uploaded binary)
- Click Apply
- Click Run
Analyzing Data #
Application Profiler#
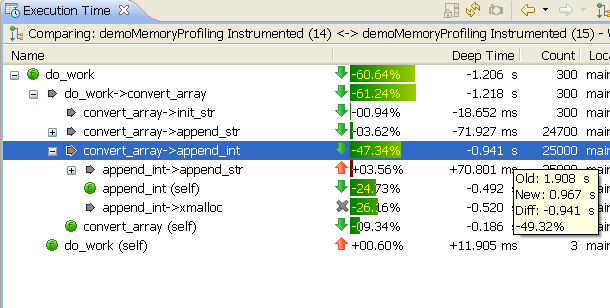
It should be self explanatory in most of the cases.
There is a feature description article at:
What is New in Application Profiler
User Documentation: Profiling an Application
System Profiler#
Please check this page:
Usage of Function Instrumentation in System Profiler
Release Notes for IDE 4.5#
Official Release Notes
- When using Call Count & Sampling - in Threads tree mode function time is incorrectly aggregated, use Table mode to validate function time
- When importing from .kev file into Application Profiler - .kev file and the binary must be in the workspace (even dialog allows to pick them from other location - it won't work)
- When importing from .kev file binary that you select, must match binary name in the trace, otherwise empty session would be created
- When using Address Translation for profiler events in System Profiler, binary for symbols resolution must be in some sort of C Project - recognized as binary by IDE (not in general project or qnx target project)
- When attaching to a running application you cannot use random file name, same file name must be used in target launch environment, i.e. QPROF_FILE env var)
- When using postmortem Call Count profiling with gmon.out generated by binary compiled by SDP 6.4.0 toolchain, it produces reversed call pairs - you have to use Show Reversed Calls - to see direct calls, and visa versa
How it works#
Sampling#
Target agent (qconn) schedules a task at every 1 ms to check where target process is. "Where the process" defined by its $pc register. To read process registers the reading
process must have root permissions. The result of sample (thread id and $pc address) is stored in gmon.out file or transfered directly to IDE through /dev/profiler device.
Call Count instrumentation#
When compiled with -p gcc inserts function _mcount on entry of each functionion, _mcount functions records the call pair and count for call pair. The result is saved in gmon.out file
or transfered directly to IDE through /dev/profiler device.
Function Instrumentation #
When compiled with -finstrument-functions gcc inserts two hooks - for entry and exit from the function, thus allowing to measure not only call count but time that took for function
to execute. Functions hooks do one of the following: for single app mode - they record call-pair and function enter/exit timing information (measured in ClockCycles()) to the buffers,
which is dumped to a file when full. File can be read by IDE in real time or imported to IDE afterwards. The file is usually is referred as ptrace file. File operations can be unsafe for drivers code or interrupt handlers, this mode should be avoided in this case or these functions cannot be instrumented.
In system wide mode (also referred as Kernel Tracing mode) hooks implement trace events. Events are stored in the kernel ring buffer and can be retrieved when trace logger process is running (or read by qconn). The tracelogger output is usually referred as .kev file. Kev file can be viewed in both System Profiler and Application Profiler. It is possible to insert same trace events manually to achieve similar effect for selected sections of code.
If you have any questions or feedback, post into the
ide forum.
